Saturday, 29 August 2015

All in Harmony.

The goodship Harmony sails again! This time with ex-crew now owner Jon Roots, he of mystery 14 knots top-speed fame, a top sailing chef and all round great bloke, take some time to check out his excellent blog, my turn to helm.

The boats based in Largs and from the looks of it Harmony's getting some miles under her keels, i've also learned Dylans bought another Centaur so just goes to show the additive nature of these cracking little boats.

Just got to get mine in the water now so in the meantime heres myself Jon and Dylan sailing this great little boat all the way from Chichester to Anstruther, the trip de-brief at the end still makes me laugh.

I would do that trip again with those two in the blink of an eye - it was such a great laugh, with Jon's wit, Dylan's endless fiddling and my snoring we made a good team...........


Thursday, 27 August 2015

'Kin Jobsworth.

Well i've written and now proof-read my Encylcopedia Centauranica, might get it bound later, still after going through everything, absolutely every last job i realised a glaring omission - the water tank

I meant to remove it when i was in there years ago re-coring the deck but somehow forgot so without further a do i set about working out where the tank appeared to be from nothing more than the tiny gapin the bulkhead below the berth. From that i could work out where the tank was within an inch or so then drew it out on the berth top and proceeded to cut. 

Thing was, and much like the foredeck when i cut that away, after i had joined up all the cuts i presumed it would just come away - wrong! Cue some quite 'salty' language as my fingers kept getting pinched whilst trying to get a chisel into the cut grp, still i persevered and was rewarded eventually.

As it turned out that was the easy bit, as Westerly' way of fixing various items to the boats hull and not being able to figure out how was in evidence here, with all the pipework cut from the tank theoretically it should just pull out but no.

Having made the hole i originally cut wide enough to get my arms down each side of the tank i ripped it from its base, turns out and i haven't figured out how they did it, they tabbed the tank to the underside of the berth base, bizarre.

Have to admit for a tank thats forty plus years old its in great nick but peering in through the old inlet with a maglite proves my decision to replace is the right one, whats on the bottom of the tank can only be described as scaly, brown and it glints too and to think we used to drink from this!

So like the rest of the tanks i will get a smaller polyprope one, i say smaller as the space is a bit awkward but also thought that cycling the water would be better way of keeping the tank clean.   

To round off i tabbed and sheathed the bulkheads the tank fits between seeing as it had none due to the internal moulding restricting access, today i'll run some hardwood out for the new tank mounts.


Monday, 24 August 2015

To the point!

Been working up in Oxford recently. but having had three straight weeks of near continuous frustration and intransigence courtesy of the job i decided to take a little time to catch up on a few things back home as well as a few bits on the boat, or the keels to be more precise.

After posting some progress pics on Sailing Anarchy' site one of the sites forum contributors told me i might want to 'crisp' the trailing edges of the keels up, the particular contributor was only Bob Perry.

For those who dont know Bob's a yacht designer, writer and sometime grouch based in Seattle whose work is truly global having designed for many yards and private clients all over the world so i took his words seriously and started figuring out how to lose the 'drinkers nose' look to the keels edges.  

Seeing as the original trailing edge was over an inch wide i figured using some fabricated glass plate around 1/8" thick would at least help the keel slip through the water a bit better, so having figured out where the vertical centre of the keels edge is i spotted them on the old trailing edge with duct tape then when it'd kicked i then filleted with more cabosil'd wests then faired out with 410.

Been varnishing the window frames using Hempels Diamond Gloss which proved a little frustrating as its thinner than water but slowly getting there although i had to re-laminate the very first frame i made as it curiously turned yellow so that was a set back.

Other than that not alot, as i now need to sit down and start designing the systems for the inside and where everything will go plus i want to break everything down now into job sheets so as i get breaks from paid work i can pick up a 'job' in the shop and do it. So amongst other work commitments this week i'll start designing a 21st century reimagining of a Centaur.

A little late after seven years............................................... 


Thursday, 23 July 2015

Tantric Foreplay?

F**ked if i know? but thats what my project is according to a contributor on the ybw forum, never thought of it like that and why is it you always think of Sting when you hear the word 'tantric'......................................

Still, on with todays reminiscences, got the last frame done (again) having pulled it from the bag and found a plethora of problems so couldn't be bothered to unpick 'em - instead choosing to blast it with the sander and go again.
Got it out around 8pm tonight and all is well so we now have a full set of carbon/epoxy/oak window frames, also made a carbon riving knife for the site saw as i got a bollocking last time i was on site using it with no crown guard. 

Quite enjoying this composite stuff and have seen a thousand more places to use it on the boat, i bought a 50m roll of 100mm kevlar tape years ago as i wanted to do something with the strakes and knowing how tough this stuff is after doing my keels i revisited the material when making some plates out of the stuff.
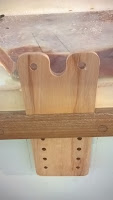
Problem is even using a router and brand new cutter i was still left with a ball of fluff after a couple of cuts so back to the drawing board with that one but the idea is sound as it ties a couple of themes together that are the bedrock of the project which are to modernise / update the design and cut the maintainance down.

Got the strakes cut over yesterday and today, its to accomodate the new chainplates that will bolt through the hull and take the inners and cap shrouds into one point and of course take a hell of a load as there'll be no backstay so got to get this perfect.
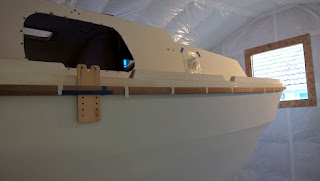
Things went from shit to shitter within 10 minutes of making the first incision, a result of me dosing the teak for years with acetone to kill the oil in it, this so i can bond to it - either a teak or kevlar cap, has left the strake weak in places and so watching lumps fall out having been struck fairly gently with a hammer and chesil to cut the slots worried me greatly.

Having got over the unease of attacking pretty much perfect strakes and left afterwards with what looked like your usual effort after a visit from a sky installer i got what i needed done to be confronted with another 'gulp' moment which involved routing the side out of the deck where it forms the vital join over the side of the hull. 
Admittedly it wasn't a deep cut but decks are to boats what roofs are to houses - if they dont leak you dont touch them and i did so it remains to be seen what the effects will be seeing as they'll be a lot of stresses running through this part of the structure.

Like everything i do with this folly - if in doubt get the epoxy out - so shall douse the area later.


Tuesday, 21 July 2015

Two down two to go.

Got the first two frames to the point of uv coating, so these have now all had four rediculously thick coats of wests and look like this:


Not bad for an amateur, theres a few bumps and that weird mikly finish on the one above as the top one seems a lot clearer in appearance, but for a first go at something other than glass sheet not too bad i guess?

Monday, 13 July 2015

Success!!!!!!!!!!!!!!!!!!!!!!!


Did this frame again tonight, and by hand until the resin had started to kick then popped in the bag with some bread wrap for a couple of hours. Just pulled it 20 minutes ago and its perfect - well in my eyes it is - so will sand it up tomorrow night and get another one laminated up too.

Cheers

Sunday, 12 July 2015

That went a little too well.

Really wasnt looking forward to sheathing the frames, not a complex shape just fiddily, still thought it prudent to practice so got two pumps of 205 and thickened with cabosil and painted up the basecoated frames.

Seeing as i wanted to know all the pitfuls i cut a piece of fine glass cloth, cant be more than 150g and laid it over the wetted out frame, to my surprise it found its own shape with no heat gun just a brush for stippling and some stirrer (giant lollipop) sticks to help ease the cloth into the rebate.

Thinking this was gonna take ages and end with me storming out the shed covered in cloth and resin it was as anti-climatic as it was surprising - i may as well have been laminating a flat sheet as thats how it easy it was.

I decide to leave the fine cloth on and go for real with the Silvershadow cloth i bought for the job, this stuff is very 'glitterball' hence the basecoating of the frames, this i did with some black pigment and then dark grey once i realised there were set lumps of cured resin in the pot of black.

The resulting hue is a slightly less 'blingy' look but a nice understated petrol blue/grey to the weave which i manipulated abit to keep its direction straight, just hope it looks as good as it did when i placed it in the bag.

You have a 2-3 second window when the vacuum is pulling up tight to whizz round with your hands and a chosen implement to get the bag into all the nooks and cranny's. I did this then realised i'd left the bread wrap out but since the pull down was so good i wasn't gonna risk fiddling with it.

I'll be back in a few hours with the result.


*EDIT*

It kinda worked, but got one tuck in the bottom right hand corner so will re-laminate this one and then either do away with the vac bag part as arguably the frame went in looking better than came out or may do what i did when making the settee module and fit a bleed-off valve on the bag so i can control the pull down a lot better and check for any problems.

Definately mustn't forget bread wrap next time as getting this out of its solid case of breather cloth and peel ply took some time: