Thursday, 23 July 2015

Tantric Foreplay?

F**ked if i know? but thats what my project is according to a contributor on the ybw forum, never thought of it like that and why is it you always think of Sting when you hear the word 'tantric'......................................

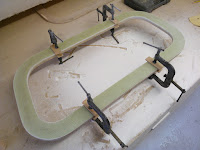
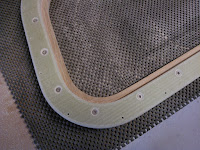
Still, on with todays reminiscences, got the last frame done (again) having pulled it from the bag and found a plethora of problems so couldn't be bothered to unpick 'em - instead choosing to blast it with the sander and go again.
Got it out around 8pm tonight and all is well so we now have a full set of carbon/epoxy/oak window frames, also made a carbon riving knife for the site saw as i got a bollocking last time i was on site using it with no crown guard. 

Quite enjoying this composite stuff and have seen a thousand more places to use it on the boat, i bought a 50m roll of 100mm kevlar tape years ago as i wanted to do something with the strakes and knowing how tough this stuff is after doing my keels i revisited the material when making some plates out of the stuff.
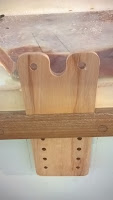
Problem is even using a router and brand new cutter i was still left with a ball of fluff after a couple of cuts so back to the drawing board with that one but the idea is sound as it ties a couple of themes together that are the bedrock of the project which are to modernise / update the design and cut the maintainance down.

Got the strakes cut over yesterday and today, its to accomodate the new chainplates that will bolt through the hull and take the inners and cap shrouds into one point and of course take a hell of a load as there'll be no backstay so got to get this perfect.
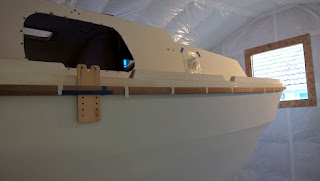
Things went from shit to shitter within 10 minutes of making the first incision, a result of me dosing the teak for years with acetone to kill the oil in it, this so i can bond to it - either a teak or kevlar cap, has left the strake weak in places and so watching lumps fall out having been struck fairly gently with a hammer and chesil to cut the slots worried me greatly.

Having got over the unease of attacking pretty much perfect strakes and left afterwards with what looked like your usual effort after a visit from a sky installer i got what i needed done to be confronted with another 'gulp' moment which involved routing the side out of the deck where it forms the vital join over the side of the hull. 
Admittedly it wasn't a deep cut but decks are to boats what roofs are to houses - if they dont leak you dont touch them and i did so it remains to be seen what the effects will be seeing as they'll be a lot of stresses running through this part of the structure.

Like everything i do with this folly - if in doubt get the epoxy out - so shall douse the area later.


Tuesday, 21 July 2015

Two down two to go.

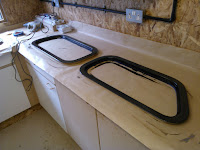
Got the first two frames to the point of uv coating, so these have now all had four rediculously thick coats of wests and look like this:


Not bad for an amateur, theres a few bumps and that weird mikly finish on the one above as the top one seems a lot clearer in appearance, but for a first go at something other than glass sheet not too bad i guess?

Monday, 13 July 2015

Success!!!!!!!!!!!!!!!!!!!!!!!


Did this frame again tonight, and by hand until the resin had started to kick then popped in the bag with some bread wrap for a couple of hours. Just pulled it 20 minutes ago and its perfect - well in my eyes it is - so will sand it up tomorrow night and get another one laminated up too.

Cheers

Sunday, 12 July 2015

That went a little too well.

Really wasnt looking forward to sheathing the frames, not a complex shape just fiddily, still thought it prudent to practice so got two pumps of 205 and thickened with cabosil and painted up the basecoated frames.

Seeing as i wanted to know all the pitfuls i cut a piece of fine glass cloth, cant be more than 150g and laid it over the wetted out frame, to my surprise it found its own shape with no heat gun just a brush for stippling and some stirrer (giant lollipop) sticks to help ease the cloth into the rebate.

Thinking this was gonna take ages and end with me storming out the shed covered in cloth and resin it was as anti-climatic as it was surprising - i may as well have been laminating a flat sheet as thats how it easy it was.

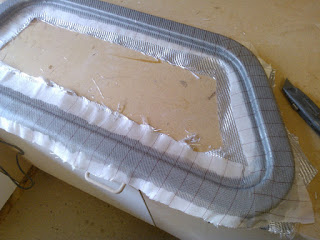
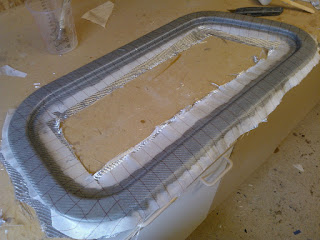
I decide to leave the fine cloth on and go for real with the Silvershadow cloth i bought for the job, this stuff is very 'glitterball' hence the basecoating of the frames, this i did with some black pigment and then dark grey once i realised there were set lumps of cured resin in the pot of black.

The resulting hue is a slightly less 'blingy' look but a nice understated petrol blue/grey to the weave which i manipulated abit to keep its direction straight, just hope it looks as good as it did when i placed it in the bag.

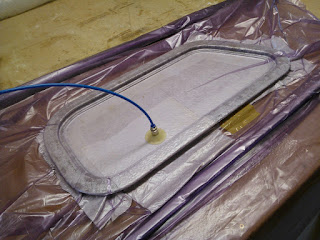
You have a 2-3 second window when the vacuum is pulling up tight to whizz round with your hands and a chosen implement to get the bag into all the nooks and cranny's. I did this then realised i'd left the bread wrap out but since the pull down was so good i wasn't gonna risk fiddling with it.

I'll be back in a few hours with the result.


*EDIT*

It kinda worked, but got one tuck in the bottom right hand corner so will re-laminate this one and then either do away with the vac bag part as arguably the frame went in looking better than came out or may do what i did when making the settee module and fit a bleed-off valve on the bag so i can control the pull down a lot better and check for any problems.

Definately mustn't forget bread wrap next time as getting this out of its solid case of breather cloth and peel ply took some time:


Friday, 10 July 2015

That glazed expression

It happens alot, more times than i care to admit, stood at the bench in my shop going how the hell am i gonna make that, hence the title, i'd glaze over abit, put some gnarly prog on, (maybe some Egg or early Soft Machine) nothing like a Rhodes played manically to get the synapses firing.

Thats normally what happens..........................(inspiration takes many forms).

With the windows the intention was always to fabricate my own but after two goes since 2011 the last attempt being 2013, the inspiration just hadn't stuck, i think a combination of poor material choice and crap quality router cutters did a lot to park it up in the back of the cupboard but what with the clock ticking and the need to get things going it was a reluctant priority having got a week off work.

I always wanted them trimmed out in wood (cabin side) so whatever i did there would be timber involved, originally i made a set out of marine ply to then be glass sheathed and veneered in oak a heap of work on top of an already heap of work repairing the ply from the various worn and cheap cutters used to make them.

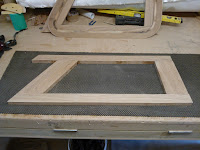
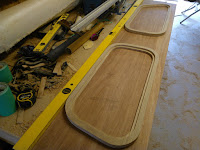
Still, having a couple of lengths of white oak on the floor of the shop i cut and glued one frame up to see if it'd work, ironically using one of the old ply frames as a template for the bearing cutter to follow, it all went swimmingly so having made the basic frames for the other three i set about making the outers.

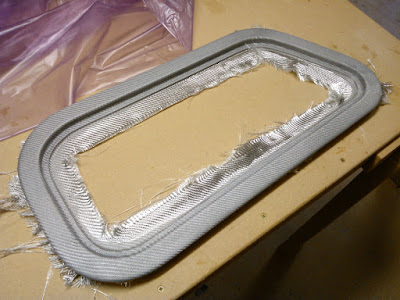
Some may recall the utter mess that was my attempt to batch laminate all four frames worth which resulted in me smashing them apart with wedges and large hammers, still after i re-made these plates of 'glass' individually i had a great basis to work from.

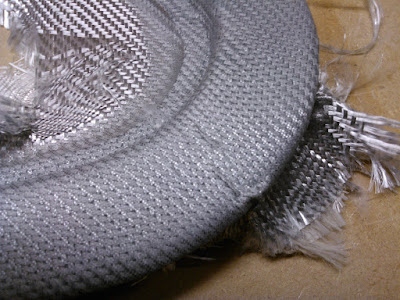
I machined these much like i would timber the difference being the rebate cutter and one of the bearing cutters now have concave profiles to them, to say epoxy is tough is putting it mildy. I'm gonna chance my arm today (Friday) and see if i can get the other two made without buying more hardware.

Early results indicate i may have got there although theres plenty of finishing still to do to them, next on the hit list (realistically on the next break from work) will be the cockpit coamings.


Wednesday, 8 July 2015

I'm back.

Having speedily installed the first lot of kitchens on site it turns out the next delivery is a couple of weeks off so back home i've come and with the van working perfectly i can now turn my attentions to the Centaur.

On my mega list of things to do, two things stick out that are technically difficult to execute (imo) and that is the cockpit coamings and the windows, the windows you're thinking i could buy - well i could but the quote in the filing cabinet from Houdini some ten years ago was nudging £800 exchange so God knows what the cost would be today.

Also going against the original aluminium framed design is the fact i want to insulate the cabin so it makes it difficult to incorporate that into the design plus the fact the old ones are quite rotten i dont want ever to do this again so for the third time i got the window frame templates out of the cupboard i made in 2011 and pontificated abit.

The original idea was to make a perfect copy in marine ply and then sheath but the ply was/is awful quality requiring alot of finishing and having made two attempts gave up and put it all back in the cupboard. I then came up with the idea of a wood inner frame and a composite outer frame which i duely laminated up (all four frames worth) in one hit which all stuck together and had (with the use of wedges and various hammers) to be broken apart. 

With another sulk i once again put everything back in the cupboard but this Monday i vowed to make it happen so with a load of over-bought American white oak i set about making the inner frames with an eye to using the composite panels i successfully laminated last year.