Thursday, 31 December 2015
Tuesday, 8 December 2015
Nothing then Something.
Had a couple of days off as i was seeing a great band in Bournemouth last night so i planned ahead - frivilous i know, & bought a couple of sheets of MDF, one 18 and one 25mm all in aid of making a supersized former to make the remainder of the curved components for the interior.
The original one got completely annihilated when making the corner pieces for the galley modules so seeing as theres still a load of pieces to make i thought i could use the free time making something more durable.
Also the fact there are a zillion more jobs to do i didn't want it occupying bench space so set about building it into the boat shed, the only conundrum was how big to make it?
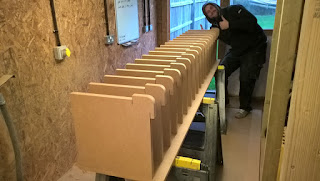 An answer came swiftly as i want to make the inside of the coachroof and underside of the sidedeck in one piece - this measuring some 2.4m long and about 450mm x 450mm so that was the benchmark. Although because of the nature of bending timber along its grain it'll still be made of two separate 1200mm pieces it means i can do it all in one go.
I wont lie - i've had enough of living in the van and want to get on with the boat so by making these bits and pieces, when the time comes to get back on with the boat it should speed things up a little.
Well thats the plan anyway.
Thursday, 29 October 2015
Sorry..........................
I'm nowhere near the shed, so have consoled myself with finishing the contract first, (should be end of the year beginning of next) then crack on with the boat afterwards, plus it beats biting my nails down to the quik trying to figure out how to progress with no money in the bank.
Still,this came in from Eric a couple of days ago, what d'you think?
Sunday, 18 October 2015
Saturday, 3 October 2015
Still in Front
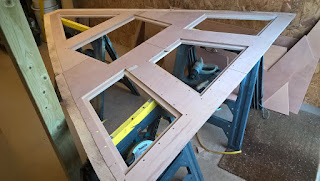 Still pushing on, although didn't get the forepeak finished, its all bolted down, epoxied, bedded and tabbed to the boat, this after endlessly veneering and capping everything - man that got tedious by the third day, see i originallythought i'd have it all done in a week and yet two weeks on still not complete.
 I dry-fitted it altogether in the shop first to make sure there'd be no surprises once the epoxy was mixed and PU gooped everywhere and in fairness there wasn't. I dunno why even after all this time having tackled some reasonably big jobs like the keels and sheathing the hull i still get incredibly nervous fitting stuff even with everything laid out in front of me: tools, materials and a crib sheet - seriously!
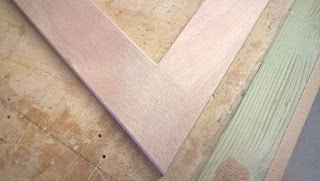 I think in this particular case its due to the confining space of the forecabin on these boats and i'm waving sheets of ply around that are 900mm x 900mm and trying:
a) to get it through the forecabin opening without damaging the ply
b) not to get any of the adhesive on the ply until i've got it in place &
c) to forget the ticking clock that starts in my head the minute i've mixed the epoxy and squeezed three tubes of structural PU about the place.
After yet another feeling of eternity and thoroughly soaked through in sweat (nervous energy) plus 200 screws it was all over bar the wiping off of excess adhesive of all varieties.
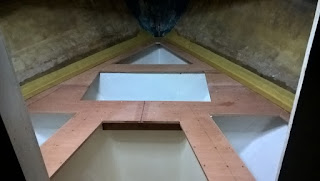 Also to add to the tension is the fact you're stooped (5ft headroom) and because of the new arrangement a mile from where you need to be, much easier walking around all three sides in the shop but when in place its a ball ache to lean over to check joints have pulled up and wafers have stayed in place. I cured that problem with several plywood straps to hold them together then fired what seemed like box after box of wood screws into predrilled and countersunk holes.
The upshot was being too tired the next day to do anything meaningful other than clean the shop up. Still after a bit of local paid work i got the lids veneered and trimmed so they're ready to go, just need to get in the cabin to trim the veneer that will cover the top and get that bonded down.
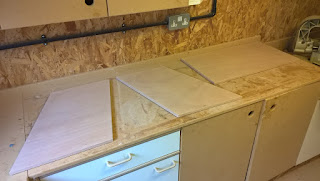 I'm also looking for a 2k clearcoat to do the interior with, if anyone has any ideas post in the comments section cheers, as after paying £40 a litre for the hempels to do the windows with i realise i'll go broke again based on how much interior joinery there is to coat plus i want some thing quick drying and sprayable too
I think since its internal i may well approach an old supplier from my furniture days, from memory a 20L drum of 2k semi matt was around £120, it would've gone up but it'll be cheaper than any tin with a picture of a boat on it.
I've tacked the latest photos onto the existing album of the forecabin here
cheers.
Thursday, 24 September 2015
More news
I spent quite a bit of time this morning measuring and cutting openings in the ply, then seeing as its a three piece jigsaw made sure everything lines up as some of the openings are spilt between the panels so a little taxing but by 6 this evening had everything machined, routed, grooved and sanded ready to bond up tomorrow.
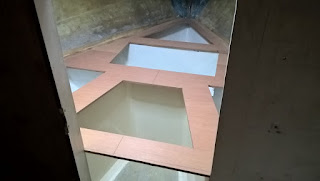
Gonna cap the openings that aren't split between the panels then once cured will cap everything else and frame up all the openings.
Wednesday, 23 September 2015
News from the front.
Having worked myself out of work (going too fast for everyone else), i somehow ended up with a week off - no bad thing if i'm honest after three weeks living in the van on tinned food i think i'd reached my limit.
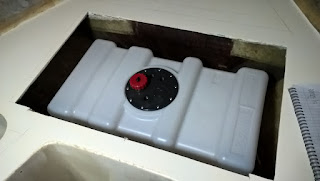 So what to do?, the list is long but i'd started the forepeak on my last break so commited to finishing it, this would involve opening up the moulding enough to get new structure over the top of it without excessive weight hence cutting alot of the old glass away.
I should say at this point i really wished i had done what Derek did with his Konsort and Tim Lackey over in the States does with nearly every project and that is to have gutted the entire inside of my boat, sounds drastic but so much of my time is wasted trying to figure out how to blend old to new how to attach old to new or how to get old and new looking like it should be there.
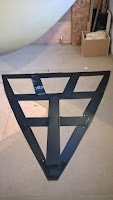 Still too late now but seeing how small the bulkhead opening is in the forepeak and the size of ply to go in there i basically stared at the problem for half a day figuring in which direction to cut the boards so as to fit in the space whilst reducing weaknesses from said joints to a minimum.
Got there eventually via a trusty correx template of the berth base, then set about the moulding with a new toy for Bicester - a cordless, brushless jigsaw which made light work of the whole affair if not a little dusty.
 Still, one bonus of the job was discovering a rather large locker in the bow, from looking at earlier models than mine this was the original chain locker, this wouldn't be needed for such a purpose on mine so decided to enlarge the hatch from modest to feckin' huge. I did the same with the lockers either side of the berth so i can make framed locker lids in much the same vain as the saloon berth.
The idea in all of this is to provide access to the new water tank, and plenty of actual accessible storage via a series of hinged locker lids also by bringing the forecabin bulkhead all the way to the floor and in doing so filling in the centre part of the berth i'll create a load more space and one super massive berth.
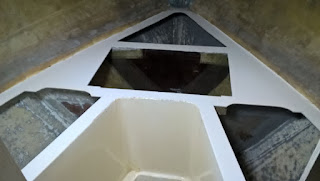 One observation i made too today is how high the floor is in the space where the heads and hanging locker is so will have that out this week or next to take the crick out of my neck, theres at least 3" extra headroom to be had and i'm having it!
Think the worst job this week was grinding all the dead bilge paint out of the lockers and off the inside of the cain roof, had the crime-scene suit on, cans and mask and still felt sick afterwards so gave it an hour before getting back in there with the Henry hoover, but at least its a bit more progress.
One thing i did notice whilst cutting and grinding is what looks to be either a really shitty bit of laminating work or a bad repair to the the bow, dunno which to be honest, mind you there was a fair few repairs externally when i stripped the antifoul off so nothing new really.
Saturday, 29 August 2015
All in Harmony.
The goodship Harmony sails again! This time with ex-crew now owner Jon Roots, he of mystery 14 knots top-speed fame, a top sailing chef and all round great bloke, take some time to check out his excellent blog, my turn to helm.
The boats based in Largs and from the looks of it Harmony's getting some miles under her keels, i've also learned Dylans bought another Centaur so just goes to show the additive nature of these cracking little boats.
Just got to get mine in the water now so in the meantime heres myself Jon and Dylan sailing this great little boat all the way from Chichester to Anstruther, the trip de-brief at the end still makes me laugh.
I would do that trip again with those two in the blink of an eye - it was such a great laugh, with Jon's wit, Dylan's endless fiddling and my snoring we made a good team...........
Thursday, 27 August 2015
'Kin Jobsworth.
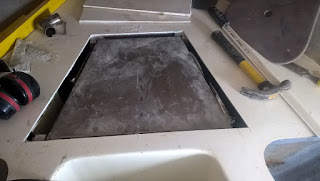 Well i've written and now proof-read my Encylcopedia Centauranica, might get it bound later, still after going through everything, absolutely every last job i realised a glaring omission - the water tank.
 I meant to remove it when i was in there years ago re-coring the deck but somehow forgot so without further a do i set about working out where the tank appeared to be from nothing more than the tiny gapin the bulkhead below the berth. From that i could work out where the tank was within an inch or so then drew it out on the berth top and proceeded to cut.
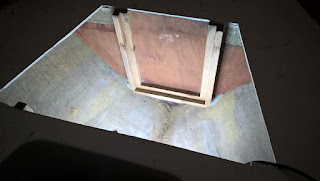 Thing was, and much like the foredeck when i cut that away, after i had joined up all the cuts i presumed it would just come away - wrong! Cue some quite 'salty' language as my fingers kept getting pinched whilst trying to get a chisel into the cut grp, still i persevered and was rewarded eventually.
As it turned out that was the easy bit, as Westerly' way of fixing various items to the boats hull and not being able to figure out how was in evidence here, with all the pipework cut from the tank theoretically it should just pull out but no.
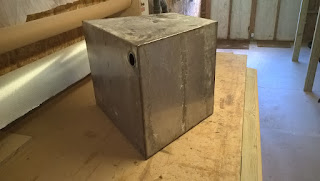 Having made the hole i originally cut wide enough to get my arms down each side of the tank i ripped it from its base, turns out and i haven't figured out how they did it, they tabbed the tank to the underside of the berth base, bizarre.
Have to admit for a tank thats forty plus years old its in great nick but peering in through the old inlet with a maglite proves my decision to replace is the right one, whats on the bottom of the tank can only be described as scaly, brown and it glints too and to think we used to drink from this!
So like the rest of the tanks i will get a smaller polyprope one, i say smaller as the space is a bit awkward but also thought that cycling the water would be better way of keeping the tank clean.
To round off i tabbed and sheathed the bulkheads the tank fits between seeing as it had none due to the internal moulding restricting access, today i'll run some hardwood out for the new tank mounts.
Monday, 24 August 2015
To the point!
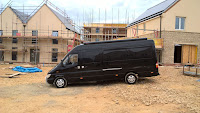 Been working up in Oxford recently. but having had three straight weeks of near continuous frustration and intransigence courtesy of the job i decided to take a little time to catch up on a few things back home as well as a few bits on the boat, or the keels to be more precise.
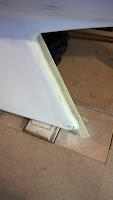 After posting some progress pics on Sailing Anarchy' site one of the sites forum contributors told me i might want to 'crisp' the trailing edges of the keels up, the particular contributor was only Bob Perry.
For those who dont know Bob's a yacht designer, writer and sometime grouch based in Seattle whose work is truly global having designed for many yards and private clients all over the world so i took his words seriously and started figuring out how to lose the 'drinkers nose' look to the keels edges.
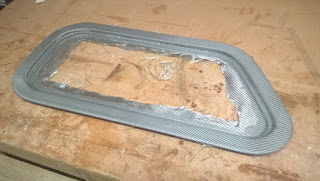 Seeing as the original trailing edge was over an inch wide i figured using some fabricated glass plate around 1/8" thick would at least help the keel slip through the water a bit better, so having figured out where the vertical centre of the keels edge is i spotted them on the old trailing edge with duct tape then when it'd kicked i then filleted with more cabosil'd wests then faired out with 410.
Been varnishing the window frames using Hempels Diamond Gloss which proved a little frustrating as its thinner than water but slowly getting there although i had to re-laminate the very first frame i made as it curiously turned yellow so that was a set back.
Other than that not alot, as i now need to sit down and start designing the systems for the inside and where everything will go plus i want to break everything down now into job sheets so as i get breaks from paid work i can pick up a 'job' in the shop and do it. So amongst other work commitments this week i'll start designing a 21st century reimagining of a Centaur.
A little late after seven years...............................................
Thursday, 23 July 2015
Tantric Foreplay?
F**ked if i know? but thats what my project is according to a contributor on the ybw forum, never thought of it like that and why is it you always think of Sting when you hear the word 'tantric'......................................
 Still, on with todays reminiscences, got the last frame done (again) having pulled it from the bag and found a plethora of problems so couldn't be bothered to unpick 'em - instead choosing to blast it with the sander and go again.
Got it out around 8pm tonight and all is well so we now have a full set of carbon/epoxy/oak window frames, also made a carbon riving knife for the site saw as i got a bollocking last time i was on site using it with no crown guard.
Quite enjoying this composite stuff and have seen a thousand more places to use it on the boat, i bought a 50m roll of 100mm kevlar tape years ago as i wanted to do something with the strakes and knowing how tough this stuff is after doing my keels i revisited the material when making some plates out of the stuff.
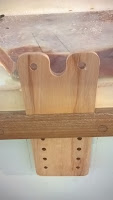 Problem is even using a router and brand new cutter i was still left with a ball of fluff after a couple of cuts so back to the drawing board with that one but the idea is sound as it ties a couple of themes together that are the bedrock of the project which are to modernise / update the design and cut the maintainance down.
Got the strakes cut over yesterday and today, its to accomodate the new chainplates that will bolt through the hull and take the inners and cap shrouds into one point and of course take a hell of a load as there'll be no backstay so got to get this perfect.
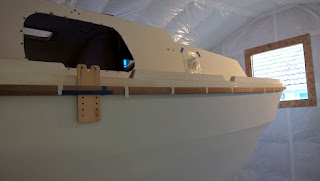 Things went from shit to shitter within 10 minutes of making the first incision, a result of me dosing the teak for years with acetone to kill the oil in it, this so i can bond to it - either a teak or kevlar cap, has left the strake weak in places and so watching lumps fall out having been struck fairly gently with a hammer and chesil to cut the slots worried me greatly.
Having got over the unease of attacking pretty much perfect strakes and left afterwards with what looked like your usual effort after a visit from a sky installer i got what i needed done to be confronted with another 'gulp' moment which involved routing the side out of the deck where it forms the vital join over the side of the hull.
Admittedly it wasn't a deep cut but decks are to boats what roofs are to houses - if they dont leak you dont touch them and i did so it remains to be seen what the effects will be seeing as they'll be a lot of stresses running through this part of the structure.
Like everything i do with this folly - if in doubt get the epoxy out - so shall douse the area later.
Tuesday, 21 July 2015
Two down two to go.
Got the first two frames to the point of uv coating, so these have now all had four rediculously thick coats of wests and look like this:
Not bad for an amateur, theres a few bumps and that weird mikly finish on the one above as the top one seems a lot clearer in appearance, but for a first go at something other than glass sheet not too bad i guess?
Not bad for an amateur, theres a few bumps and that weird mikly finish on the one above as the top one seems a lot clearer in appearance, but for a first go at something other than glass sheet not too bad i guess?
Monday, 13 July 2015
Success!!!!!!!!!!!!!!!!!!!!!!!
Did this frame again tonight, and by hand until the resin had started to kick then popped in the bag with some bread wrap for a couple of hours. Just pulled it 20 minutes ago and its perfect - well in my eyes it is - so will sand it up tomorrow night and get another one laminated up too.
Cheers
Sunday, 12 July 2015
That went a little too well.
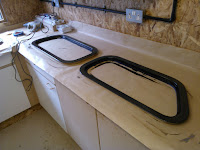 Really wasnt looking forward to sheathing the frames, not a complex shape just fiddily, still thought it prudent to practice so got two pumps of 205 and thickened with cabosil and painted up the basecoated frames.
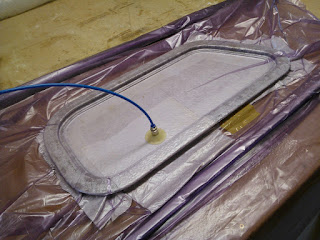
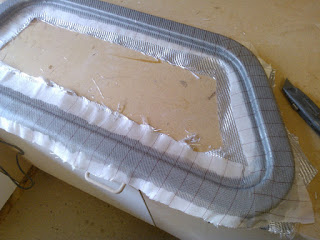 Seeing as i wanted to know all the pitfuls i cut a piece of fine glass cloth, cant be more than 150g and laid it over the wetted out frame, to my surprise it found its own shape with no heat gun just a brush for stippling and some stirrer (giant lollipop) sticks to help ease the cloth into the rebate.
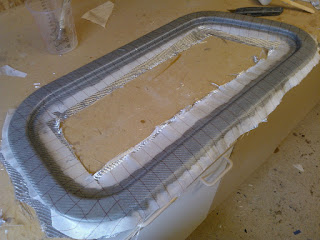 Thinking this was gonna take ages and end with me storming out the shed covered in cloth and resin it was as anti-climatic as it was surprising - i may as well have been laminating a flat sheet as thats how it easy it was.
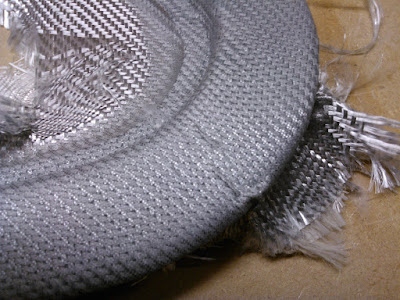
I decide to leave the fine cloth on and go for real with the Silvershadow cloth i bought for the job, this stuff is very 'glitterball' hence the basecoating of the frames, this i did with some black pigment and then dark grey once i realised there were set lumps of cured resin in the pot of black.
The resulting hue is a slightly less 'blingy' look but a nice understated petrol blue/grey to the weave which i manipulated abit to keep its direction straight, just hope it looks as good as it did when i placed it in the bag.
You have a 2-3 second window when the vacuum is pulling up tight to whizz round with your hands and a chosen implement to get the bag into all the nooks and cranny's. I did this then realised i'd left the bread wrap out but since the pull down was so good i wasn't gonna risk fiddling with it.
I'll be back in a few hours with the result.
*EDIT*
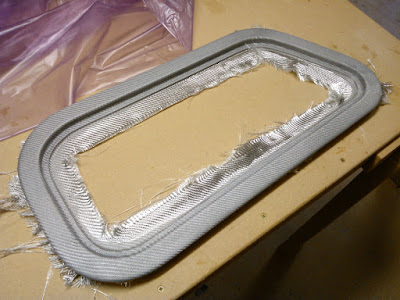
It kinda worked, but got one tuck in the bottom right hand corner so will re-laminate this one and then either do away with the vac bag part as arguably the frame went in looking better than came out or may do what i did when making the settee module and fit a bleed-off valve on the bag so i can control the pull down a lot better and check for any problems.
Definately mustn't forget bread wrap next time as getting this out of its solid case of breather cloth and peel ply took some time:
Friday, 10 July 2015
That glazed expression
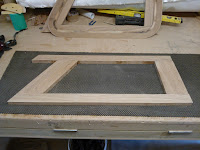 It happens alot, more times than i care to admit, stood at the bench in my shop going how the hell am i gonna make that, hence the title, i'd glaze over abit, put some gnarly prog on, (maybe some Egg or early Soft Machine) nothing like a Rhodes played manically to get the synapses firing.
Thats normally what happens..........................(inspiration takes many forms).
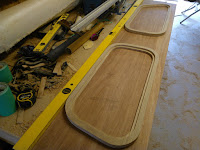 With the windows the intention was always to fabricate my own but after two goes since 2011 the last attempt being 2013, the inspiration just hadn't stuck, i think a combination of poor material choice and crap quality router cutters did a lot to park it up in the back of the cupboard but what with the clock ticking and the need to get things going it was a reluctant priority having got a week off work.
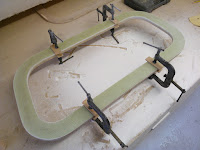 I always wanted them trimmed out in wood (cabin side) so whatever i did there would be timber involved, originally i made a set out of marine ply to then be glass sheathed and veneered in oak a heap of work on top of an already heap of work repairing the ply from the various worn and cheap cutters used to make them.
Still, having a couple of lengths of white oak on the floor of the shop i cut and glued one frame up to see if it'd work, ironically using one of the old ply frames as a template for the bearing cutter to follow, it all went swimmingly so having made the basic frames for the other three i set about making the outers.
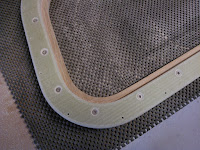 Some may recall the utter mess that was my attempt to batch laminate all four frames worth which resulted in me smashing them apart with wedges and large hammers, still after i re-made these plates of 'glass' individually i had a great basis to work from.
I machined these much like i would timber the difference being the rebate cutter and one of the bearing cutters now have concave profiles to them, to say epoxy is tough is putting it mildy. I'm gonna chance my arm today (Friday) and see if i can get the other two made without buying more hardware.
Early results indicate i may have got there although theres plenty of finishing still to do to them, next on the hit list (realistically on the next break from work) will be the cockpit coamings.
Wednesday, 8 July 2015
I'm back.
Having speedily installed the first lot of kitchens on site it turns out the next delivery is a couple of weeks off so back home i've come and with the van working perfectly i can now turn my attentions to the Centaur.
On my mega list of things to do, two things stick out that are technically difficult to execute (imo) and that is the cockpit coamings and the windows, the windows you're thinking i could buy - well i could but the quote in the filing cabinet from Houdini some ten years ago was nudging £800 exchange so God knows what the cost would be today.
Also going against the original aluminium framed design is the fact i want to insulate the cabin so it makes it difficult to incorporate that into the design plus the fact the old ones are quite rotten i dont want ever to do this again so for the third time i got the window frame templates out of the cupboard i made in 2011 and pontificated abit.
The original idea was to make a perfect copy in marine ply and then sheath but the ply was/is awful quality requiring alot of finishing and having made two attempts gave up and put it all back in the cupboard. I then came up with the idea of a wood inner frame and a composite outer frame which i duely laminated up (all four frames worth) in one hit which all stuck together and had (with the use of wedges and various hammers) to be broken apart.
With another sulk i once again put everything back in the cupboard but this Monday i vowed to make it happen so with a load of over-bought American white oak i set about making the inner frames with an eye to using the composite panels i successfully laminated last year.
Sunday, 28 June 2015
Tuesday, 16 June 2015
North Devon Redux
There really only was one thing for it after spending a manic week getting the van finished - time to tour! With a good friend of mine living in Lynton the ideal opportunity made itself known as the four hour journey would be a good test for the van.
 I got there in good time and with only one problem, the inverter didn't work when i hit the button, turns out the positive wire to the power button had snapped from its connector so a soldering iron and some solder later and the problem was solved - stand aside Tesla!
 I got there in good time and with only one problem, the inverter didn't work when i hit the button, turns out the positive wire to the power button had snapped from its connector so a soldering iron and some solder later and the problem was solved - stand aside Tesla!
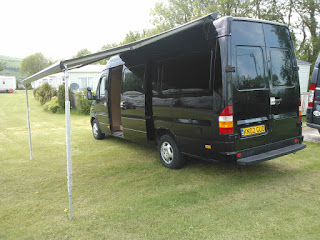
With the van fully loaded it does sit pretty low, no problem other than the fuel economy going out the window, got the awning out for the first time too, pleased to say the composite backing plates in the roof are doing their job as the whole thing can support its own weight although i did put the legs out not wanting to tempt fate.
Whilst there i went to one of my old hanuts, Ilfracombe. Very odd scupture on the quay and i don't understand what its about - never mind, the fish and chips are excellent so after sitting on a bench munching away playing spot the Westerly i moved on.
Incidentally theres quite a few Fulmar's in Ilfracombe as well as the older stuff which brings me to a certain sailing club up the road.
Incidentally theres quite a few Fulmar's in Ilfracombe as well as the older stuff which brings me to a certain sailing club up the road.
Some of you will remember a couple of years back when Dylan was looking for a Centaur that i came across a fairly knackered-looking one called Spindrift, well its still there rotting into the ground as it was two years previously, shame really. Also Centaur number one was there looking in very good fettle considering the boats age, just hope it doesn't stay in the yard too long and end up like the other one.
Tuesday, 9 June 2015
Behold, The Drawers of Destiny!
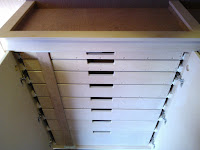 Well thats what i care to call them, damn impressive to look at anyway, seeing as the work contract i was supposed to start last Monday has been put back two weeks, i thought i'd push on finishing the van conversion.
 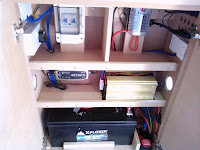 This last week has seen my debit card take a right hiding as i purchased all the necessary components to outfit the van with 240VAC and 12VDC, still after having calmed down from the initial financial hit i soon found myself engulfed in cables and shiny things.......mmm i like shiny things.
Have to admit this was one job on the Centaur i wasn't looking forward to not least of all because of the costs but also my complete lack of knowledge, and made all the more worse as i possess almost every book available on the subject of boat electrics and imho they all assume a level of knowledge.
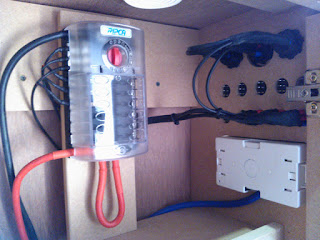 The one that didn't was Don Casey' Sailboat Electrics Simplified, this book has such a great easy-to-read style that even a fool such as myself couldn't mess it up. What i like most is the illustrations and the way the information is broken down into simple concepts. So armed with my multimeter and a heap of parts i set about electrifying the van (and not myself).
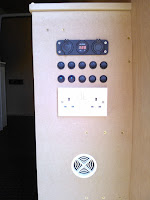 In the end i went with a 190AH battery connected to a voltage sensitive relay with a Ctek MXS 10 charger permanently attached via the AC side, on the DC side i have scope for 10 loads via a Ripca fuse box switched through 10 corresponding 12VDC rocker switches.
 I looked at purchasing a ready-made panel, something i will do with the Centaur but looking at the costs for some of these aftermarket van panels.......well, i thought the marine world was steep but it would appear the campervan world isn't much different as to have the components i actually purchased but all fitted into a piece of brushed allie / stainless doubled the cost - no thanks - i'll do this myself, and so i did with no help from anyone.
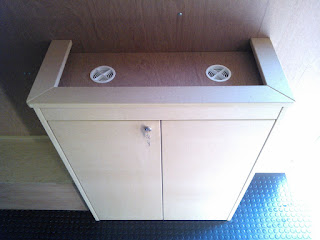 Decided to - and it was frustrating to start with - sit in the shop and play around with the battery and wiring making basic circuits just to understand how it all works and now have quite a good basic grasp of electricity.
The cabinets meanwhile were all made from mdf, not the most durable but for this application fine, realised i needed a heap more drawers as i always seem to add a couple of plastic tubs on certain jobs full of fasteners and fittings so i decided to build the ultimate drawer unit and nextdoor to this somewhere to keep and heat food.
I'm glad i did this and yes i know the van has sod all to do with the boat but everything i've bought and installed is directly applicable to the Centaurs systems only now i have the confidence to do it all myself.
Cheers
Subscribe to:
Comments (Atom)


