Sunday 11 September 2016

That was fun..........................I think?

Finally got done making a complete copy of every album so that they're all available once again in the public domain, spent from Friday evening until this afternoon doing it, god it was boring!

Still all they are are the pictures as to put in every comment from every picture from every album  in would take me until Christmas so apologies there, but thanks to Google i couldn't even copy and paste the old comments over as the pages the photos are in are locked even when i log in but hey tell Google.

Speaking of which most of the pictures that are linked in posts here on the blog do work its just you can't access them all in a gallery of albums in Google Photo's hence the need for a new album courtesy of Smugmug.

Now that's done i hope it draws a line under this bloody nightmare so i can get on with the boat, gotta be honest though this year's been a bit of a write-off in terms of getting anything major done so for the time being talk amongst yourselves and i'll be back in a tick.

Cheers.


Sunday 14 August 2016

Smugmug.com to the rescue!

Have spent the day starting the big transition from google photos to an online photo app called Smugmug.com. This so i can share all my pictures publicly to anyone and everyone, sure i've got to pay $72 a year for the privilege but its a small price to pay to escape the clutches of a truly stupid, greedy / nosey behemoth of a corporation like google. 

To re-cap google retired Picasa a free and truly brilliant piece of photo editing / hosting software to replace it with something so totally unfit for purpose you'd think it was dreamt up by a government and not a private company. 

And what with the replacement software unable to freely share pictures and albums with anybody anytime it begged the question: "Whats the point of it then?" To which all the replies i got over the past week told me to "send feedback" or "yes Picasa has been retired we understand your frustration."

Well they clearly don't as these set piece replies have been trotted out to thousands of disgruntled users like me since the start of this year looking at their forums page.

As i said on the google products forum the other night, you have to wonder how much coke's being snorted back in the office for them to not have realised the gigantic oversight to this new photo sharing app, that being you can't actually share anything without a google account.

Google seems to be heading in a rather Orwellian direction if you ask me.

Still I've got as far as uploading albums to Jan 2015 so that's 18 months worth from the most recent work and will do the rest in the coming weeks and sort the links out so i can do a full delete from google. I'm quite taken with the new smoother look to the albums page so much so i may have tidy up of my blogs page. 

But more importantly is to get some time on the boat before years end.

Cheers

Wednesday 10 August 2016

The nightmare continues..............................

Have spent the last couple of evenings going through the blog from day one to present and rather annoyingly some pictorial links work and some don't. So what i propose doing is - well - once i've found a decent alternative to Picasa will be to set up a handful of albums by year that will include the projects undertaken.

It does fuck me off a little as the whole point of this blog was the stories, the failures as well as the small victories and i kinda think its now lost a bit with Picasa's demise. I say this as i could look at a picture and remember what i was doing thinking and feeling. 

I now have little idea what pictures are where and how i go about sorting out the mess of dead links created entirely by a bunch of money grabbing twats in silcon valley.

Still the past is the past so if anyone knows of a decent alternative to Picasa give us a shout in the comments below.

Rog

Monday 8 August 2016

Thanks google..........................

For totally fucking up all my project albums, yes Picasa Web Albums came to end last week and what did they replace it with? 

Why the piece of shit known as google photos of course, except the link that i was given displays all my albums randomly - making it infinitely more difficult to navigate.

Nice one google twats!!

Have spent an entire day today trying to figure out what i was doing wrong until about 8 o'clock this evening when I discovered the google photos forum, seems i'm not alone in thinking what a piece of shit Google Photos is!

Curiously most of the links in the text work but you cant access all the albums at once like in Picasa which was a gallery of albums all neatly labelled and organised chronologically - latest first. 

You gotta wonder what goes through the minds of these fucking nerds when they take something as easy to use and as multi-faceted as Picasa and replace it with a piece of software that looks and feels like it was designed for 12 year olds with a fraction of the features.

Don't be evil................................whatever!          


Wednesday 20 July 2016

Doing the night shift....................

Finally got round to fitting the forepeak frame over the last few evenings, i must say its bloody baking in the shed at the moment:


Sunday 10 July 2016

Catch up Number eleventy twelve

Got a few days off last week so seeing as i was unhappy with the volume of over-spray on the floor I decided a re-think was in order, the plan - be it roughly - was to add more air pressure going in and to make sure it was greater than that of the exhaust fan. 


 I understand from brother Rik this is called 'positive pressure' in spraying circles so i moved the fan originally in the back of the room to the front, beside the original one in the door so there's now two fans up front and added what can only be described as a miniature jet engine to the back. 


Preliminary tests indicate i now need a tether to clip myself to whilst spraying, its pretty fierce in there, no but seriously its way better than before a fact borne out by a relatively clean floor after a good few hours of spraying.

Also after much soul searching (and bank balance checking) I bit the bullet and bought the Devilbiss GPi gun along with a smaller gun for detail work, an ANI 150 on the recommendation of 'The Gunman'. This guys the tits where spraying concerned, his stock in trade is automotive  and has the most comprehensive youtube channel with tutorials, reviews even sprays cars and talks you through what hes doing simultaneously, learnt loads from watching him - great bloke in my opinion.

What else, got my first paid job for the spraying booth, a couple of internal doors for a customer to match their existing ones which needed to be half the height of a conventional internal door, turned out great, did them using my sealey gun. That brings me to why i bought the devilbiss - the sealey sprang a leak behind the nozzle where the air needle passes through the gun and no amount of tightening would stop it and so as it was dripping paint on the substrate i was spraying thought it might be the time to make the change.

I still use it for priming but for top-coating i now have an 'industrial' grade gun, the sealey' great but i guess using it daily as i have done has shown its limitations, still on the plus side i have three of the fuckers so can cannibalise them if it comes to it.

Got another delivery from Morrells for the paint to do the bilges in the forepeak with, my thinking being i can get the paint on and come back 40 minutes later and go again and guess what? Thats exactly what i did although i got as high as kite in the process. Even with the static gimp mask on, the air fed one will be the way to go in future, i told myself it'll be fine just rollering it on but after every session found myself panting like a dog. 

Still the results look great, just need to spray the final topcoat on the forepeak frame as i spent a long time yesterday filling and fairing every dimple and shake in the timber. Still pleased with it though and so once that's done the reassembling can begin.

Sunday 12 June 2016

Like watching paint dry (very quickly).

Got done with what i wanted to do and it all looks not very Westerly, more Najad / Hallberg Rassy, even if i say so myself, the guns starting to give a little bit of gip although it may be a regulator problem but got through all the joinery i wanted clearcoating.

Gonna start on the joinery i want white maybe in the evenings this coming week, the overspray is a little problematic as theres quite alot although that would be the only reason i'd change the gun seeing as the i need 50 PSI for mine and the likes of Devilbiss need about 30 so can see the benefits as i had to re-do a couple of pieces as they felt like sandpaper to the touch although looked great at first glance.

The only other fly in the ointment is figuring out how to reassemble this lot and bond to the tophat section in the hull without disturbing too much as i go - bit like the table cloth trick and leaving all the cutlery and crockery intacted. Cant help but feel alot of salty language will be aired that day.

More than enjoying the whole experience as its a skill i'm re-learning from years ago making furniture on a commercial basis and at the price i'm paying for the lacquer i dont mind re-painting the odd piece if i'm not totally satisfied with it.


Friday 10 June 2016

Winner, winner


Chicken Dinner!

Folks I can declare the paint shop a roaring success, spent this afternoon base-coating the forepeak components in Morrells PU lacquer, For this i need to wear an air fed gimp mask but thats a small price to pay as this stuff is up there with the Reactive resins epoxy - yes it rocks too.

The reason it rocks is simple: this lacquer is touch dry in 15 minutes sandable in 30 and recoatable in 45, whereas that bloody over-priced Hempels crap i bought (to topcoat the window frames) would take 16 hours - yes thats not a typo, 16 arse-dragging hours till it went off.

And as is typical most of the time here in Blighty the marine-based product is total fucking robbery as the Morrells super quick drying PU works out at £50 give or take for 7.5 litres and the Hempels super slow diamond hard is getting on for £40 a litre!!!

 Mmm...........................fuck that!

Admittedly you dont get a cute picture of a sailboat on the Morrells tin but i can just about live with that if i'm honest. Also i should big up the Sealey spray gun i've been using, the SSG501 (if you're interested) and still available on ebay for less then £20 as the last time i talked paint i was considering a Devilbiss gun.

This mainly because they're amazing spray guns which we used to use back in the day at the shop but seeing as they were brother Rik's and i dont have money to burn i'll stick with the Sealey gun.

A truly great bit of kit seeing as you can get a needle/aircap from 1.2mm all the way upto 2.5mm making it a really versatile spray gun for no money, go buy one! 

Heres how things look at present:


Thats three coats of sealer on the above and below:

These pictures make me look almost talented - will be a different story spraying the hull and deck i'm sure, tomorrow i'll lay down the clear top coat and white basecoat for the outer frame.

My only concern based on todays efforts is i dont have enough free air capacity to run my mask and gun for more than 15 mins so when it comes to spraying the boat i may have to get a bigger air receiver................more kit i guess...............

Ciao


Wednesday 8 June 2016

Meanwhile four months later.................................

In truth i wish i had more to show but just haven't really, the joinery for the forepeak has been made and broken down currently in the paint shop awaiting lacquer and paint, the beams have been fastened to the foam bulkheads with A2 screws and thickened epoxy resin.

Spent today doing a few bits of paid work in the shop and inbetween sanding down all the pretty bits of the forepeak ready for basecoating. Other than that not a lot to tell, this is where i was at this afternoon with everything removed waiting to go back on. 


All the athwartships beams that are pattressed through the bulkheads are back on permanantly, still loving the epoxy resin, interestingly had an icing bag full of the stuff burning my hand - it was that hot - and yet still totally usuable, absolutely kicks arse.

Tuesday 10 May 2016

I'm still here....

Been getting asked why nothings happening and its all down to 'work' work, still after this job i'm doing now is done the next couple of bits of paid work are in the shop so will get back in the shed soon.

Rog

Monday 14 March 2016

Shops open!

Not much to report as i'm working at the moment but in the last couple of weeks i've managed to get the garage emptied out and re-purposed to a spray shop to commence the 'great finishing'.........sounds a bit Chinese that?

I thoroughly recommend throwing stuff away, very cathartic i find, was a bit disappointed to discover nearly every piece of hardware on a Centaurs deck is worth around £100 in scrap, still all this, and with my contribution to charity of what seemed like a rediculous amount of power tools meant i now had some room to build a spray shop.

The only two things i kept over from the original space was my bench and the beer fridge, two very important, some would say (me included) vital components in any workshop set up. The plan was to get the bench under the window and leave the bulk of the floor area free to set up tresels as required to set components down on to spray.

Also have made and fitted some drying racks as well as fitting two not so big but incredibly powerful fans: one drawing air in through the garage door and one exhausting through what was the back window. 

This to get rid of any fumes that may linger so also found myself spending a fair bit of money on filter media which looks like rockwool in various colours and thicknesses plus pleated card for the overspray to stick to beforehand and treated myself to an air-fed mask too.

The plan in all of this is to finish (in every sense of the word) as i go so as soon as a component is made be it a locker lid or bulkhead it gets lacquered or painted a colour then bonded to the boat as i dont want to go back and risk damaging stuff or getting a bad finish.

Still debating whether to buy a decent gun, got my eye on Devilbiss' FLG5 and their GPi guns as these guns will spray both primer and topcoat, might have to see how the pennies go, Have bought a couple more cheap Sealey ones the same as i used to prime the hull with high-build.
Couldn't help myself as someone on ebay was flogging them for £15 each, i paid £35 for the first one and seeing as i got it working pretty well be it with some thinner in the paint thought it a wise investment. 

Just waiting for the lacquer and paint to show up.....................


Sunday 21 February 2016

I too have suddenly become "un-busy".

*EDIT* Reactive resins has ceased trading.

Got sacked last Monday - in my case it wasn't a producer rather an over officious member of site staff. At least i'm not freezing my arse off in the van although I could've done with the money but still I wont take that shit from anyone least of all some kid barely out of short trousers.

Anyway this has freed up some time in which to get on clearing the garage to make the paintshop plus i wanted to start tidying up the newly appointed bilges before i get the frame down permenantly. I'm not too fussed about them being perfect but want them smoother, to do this i'm using another product from my new best friends at Reactive Resins. 

This stuffs called Easifair S, its a spreadable 2 part filler supplied ready made in two separate tins and again like their excellent resin system ratios 2:1 by weight so not hard to measure and use. Also because of this you get a characteristic sorely lacking with additive based products such as Wests and thats consistency everytime you use it. 

The filler itself is lightweight and wet in appearance, the hardener quite the opposite, almost like dry sponge cake, initally i thought it may have gone off but continued anyway as it all became apparent when mixing the two. You get the perfect fairing filler that doesn't slump but has enough 'give' in it as to be easily spread using a plastic card .
I used this filler as well as the trowelable version last year when fairing a 43 foot Robert Clark sloop and initially dreaded the washing and wiping down given the magnitude of the task until i learnt much like the rest of reactive resins products they're non-blushing.

So unlike Wests its as simple as; apply, let it cure then sand, theres no dicking about with scotchpads and patting down with paper towels. So far i've got the furthest forward compartment done and can report it sands a treat and like their resin is better value than West systems.

Just to reiterate, i'm not getting paid for any of this - i'm just a happy customer of reactive resins, as i've discovered, using their products is a no-brainer so get them & leave the washing and wiping up for when you next do the dishes. 


Cheers

Saturday 13 February 2016

Meanwhile, back in eco town.............


Paid work carries on, bloody freezing it is too at the moment, still - it all pushes the project on a little further so can't whinge although i find myself thinking how did we industrialise the world when watching this total shower balls up the construction of 90 houses in the Oxfordshire countryside, but thats another forum and website.


Still i got as far as cutting and assembling the new v-berth bunk frame before i returned to paid work, did this in Sapele but as with so much timber these days the quality is pretty terrible so will spray white as the scheme forming in my head is White and Oak. 

I found myself having yet another moment of inspiration like the epiphany i had over Christmas which is to convert my garaage to a spray shop. The main reason being theres shed loads to paint and the garage is a much smaller space to heat for the paint to dry plus theres little in there of any use apart from the airline and my bench.

So the next job when finished up at Bicester will be to empty out this space and re-purpose it for the job at hand.

Cheers

Monday 1 February 2016

Thats better.

Looking a bit more ship-shape up front:


Spent today tabbing the bulkheads to stringers doing the final run around both cutting and overlapping cloth so now all tied together and currently post curing with an infra red heater, all nice and strong. 

Tomorrow I'm gonna repair a couple of parts of the deck i damaged getting all the old guts out and whack abit of fairing compound around what i did today.

cheers

Sunday 31 January 2016

Just checked

As I had forgotten to earlier in the day and i can safely say the samples of Wests additives made with Syntac epoxy have all cured.............all are completely blush free & sand very well too - no clogging whatsoever.

Saturday 30 January 2016

Found my Brand - Reactive resins for the win!

*EDIT* Reactive resins have since ceased trading, a real shame if you ask me.

Right, before i go any further i'll say this i am nothing to do with reactive resins.com, i'm not affliated in any way, on the payroll, an ambassador / rep for them - nothing. Nada.

Okay.........ready.............here we go....................THIS STUFF FUCKING ROCKS!!!!!!!!!!!!!!!!!!!! 

Gees,.............. if only i found this epoxy, oh i dunno, say 8 years ago - perhaps the project would've gone alot smoother. All i can say is its the absolute conkers. I spent today playing with it in small batches getting a feel for it.

This Syntac epoxy resin is genius, not just because it doesn't blush and is better value than Wests, but because it comes in three different viscosities. I'm using EPAFD the lowest viscosity resin that ratios  2:1 (by weight) with the hardener; the one i'm using is Synamin 220, again one of three available which is their fast hardener but in these conditions you'll have plenty of time. 

I'll be honest i was a little hesistant in changing epoxy supplier seeing as i have loads of West Systems additives still left in the cupboard not to mention a third of a c pack but a combination of anger and frustration with the amount of work that wests requires eventually forced my hand. So top of the agenda was mixing up the Syntac resin and adding it to my array of go-to fillers.

First up was my everyday workhorse - Cabosil - God only knows where i'd be without this stuff, what always puzzled me though with both Cabosil & Wests own Silica was i'd always end up mashing the crystalline rocks that hadn't mixed in properly with the laminating roller no matter how much i stirred the pot.
Not a problem with the new resin - by the seventh or eighth stir of the pot I got a beautifully silky paste all even and mixed, this would be the first of many revalations. 

Next up: 410 Microlight which is Wests fairing additive, again mixed up to the consistency i use I planted it on a board along with 404 Low Density filler and 407 High Density filler all of which by this evening were dry and not atall sticky or waxy. I'll double check that in the morning and report back - initial reports are good.

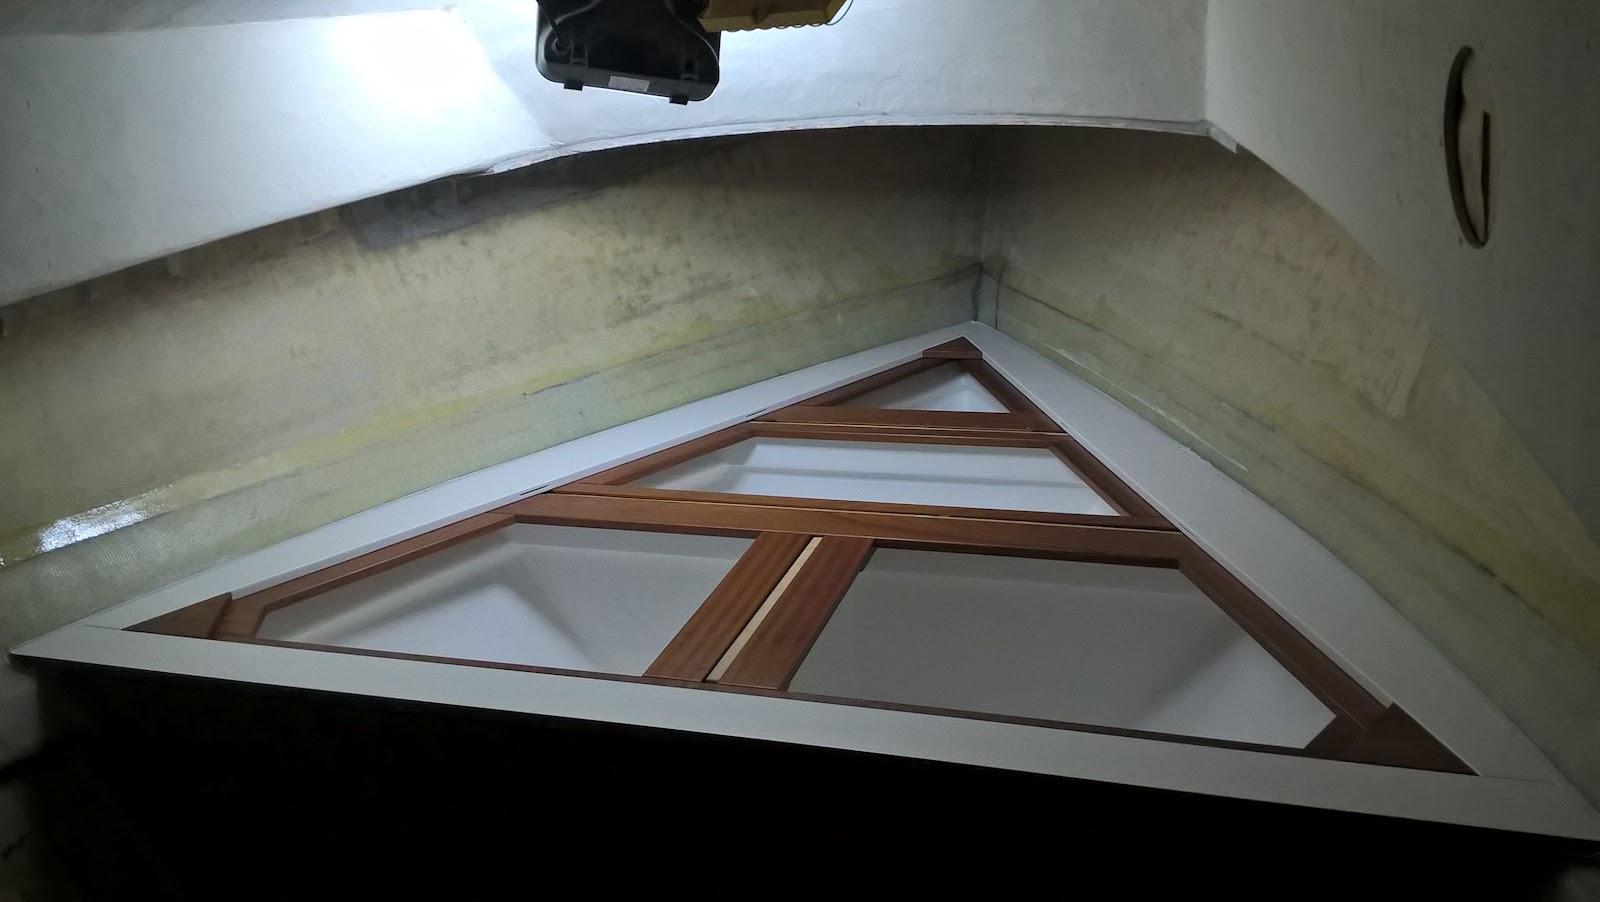
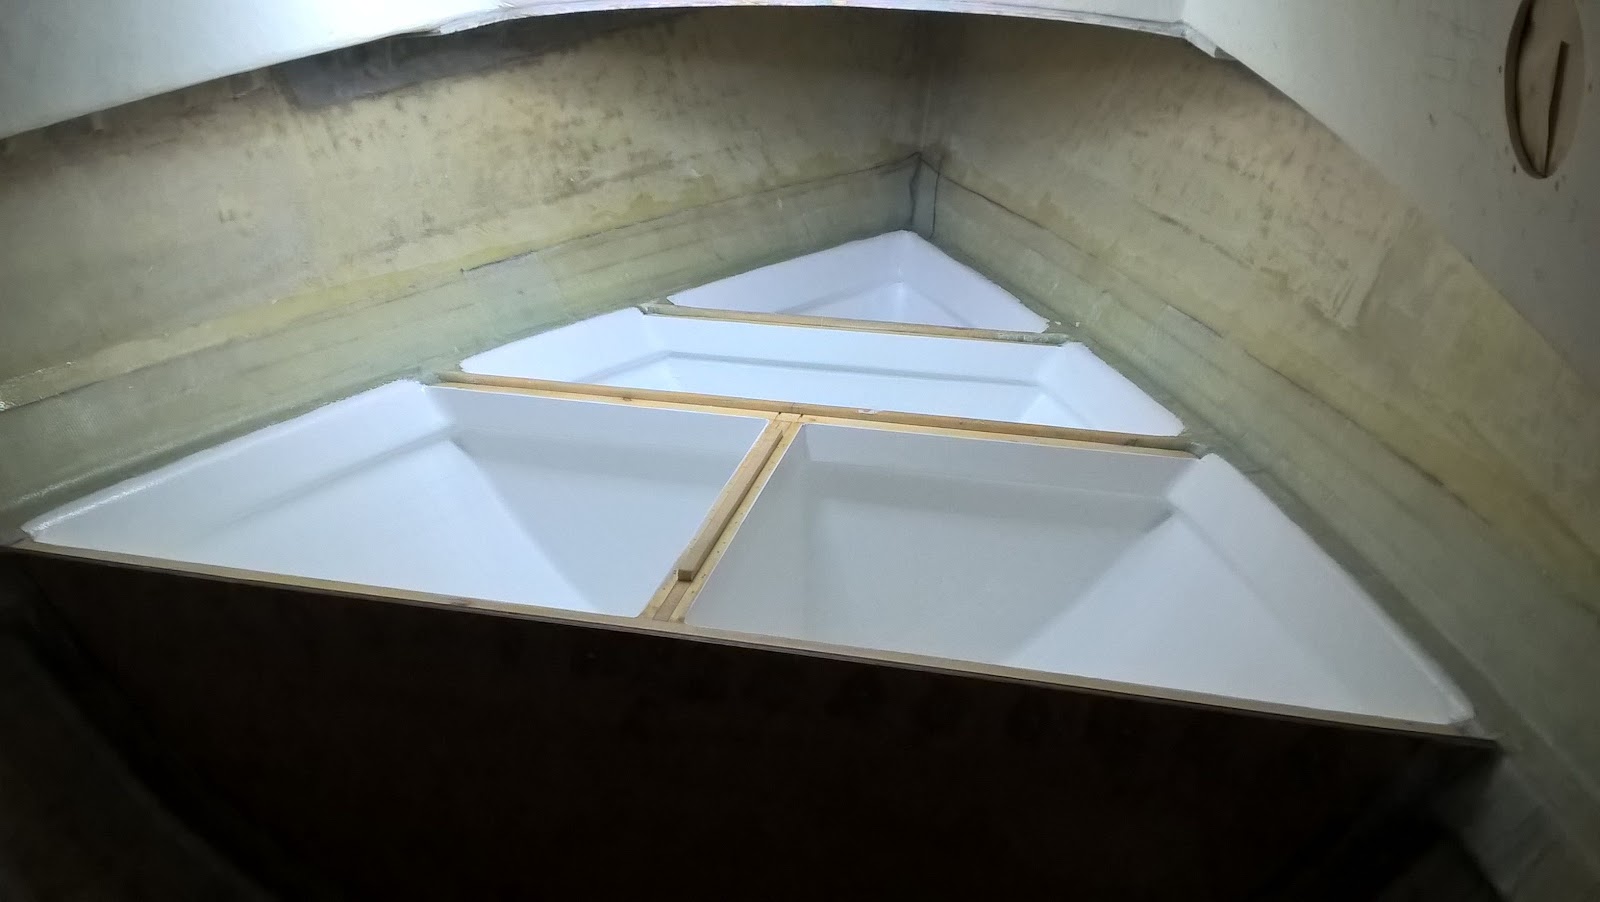
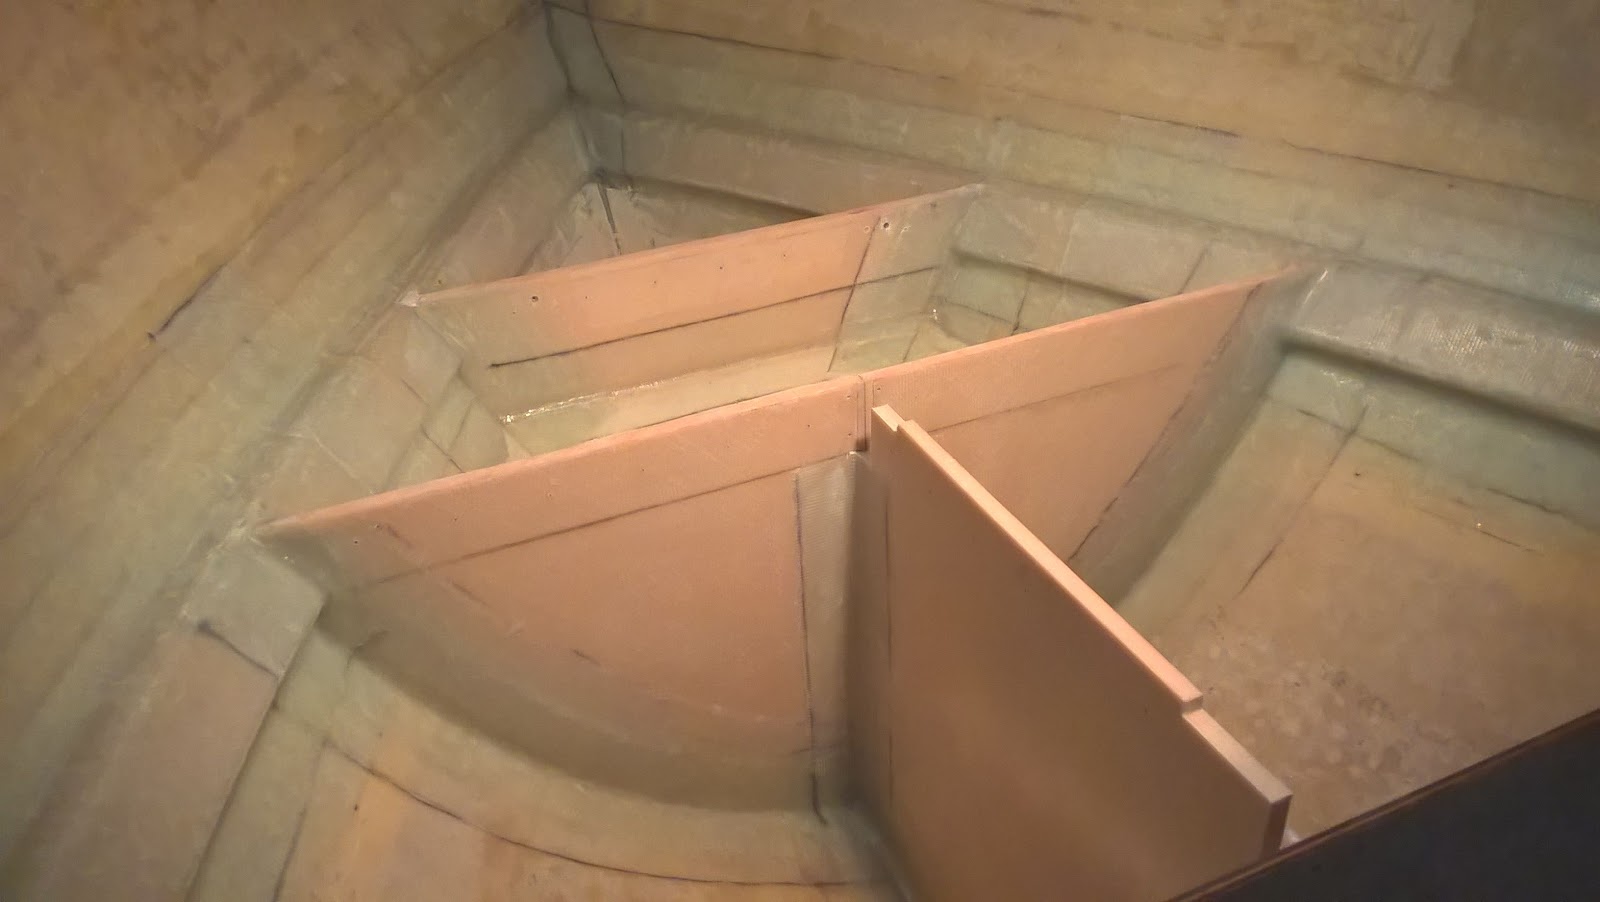
Which brings me to the work at hand - namely tabbing the ply bulkhead, for this i went three layers of 600g bi-ax cloth on a cabosil-thickened epoxy, i should say firstly i filleted the joint properly with a dense cabosil mix. Oh yeah before i forget - piping bags - another epiphany - god they cut the mess to zero, just started using disposable ones - I almost look professional now when i work. 


Anyway I started laying down the cloth - slight fuck up as i laid the hull side down first and then unfolded the bulkhead side only to find it was overlapping the tape i had applied to the edge of the rebate - this to cut down mess - so that had to come off making the left side a bit amateur-looking but no worries all went fine. I think i worked quicker too as the epoxy is so easy to work being thinner than Wests.

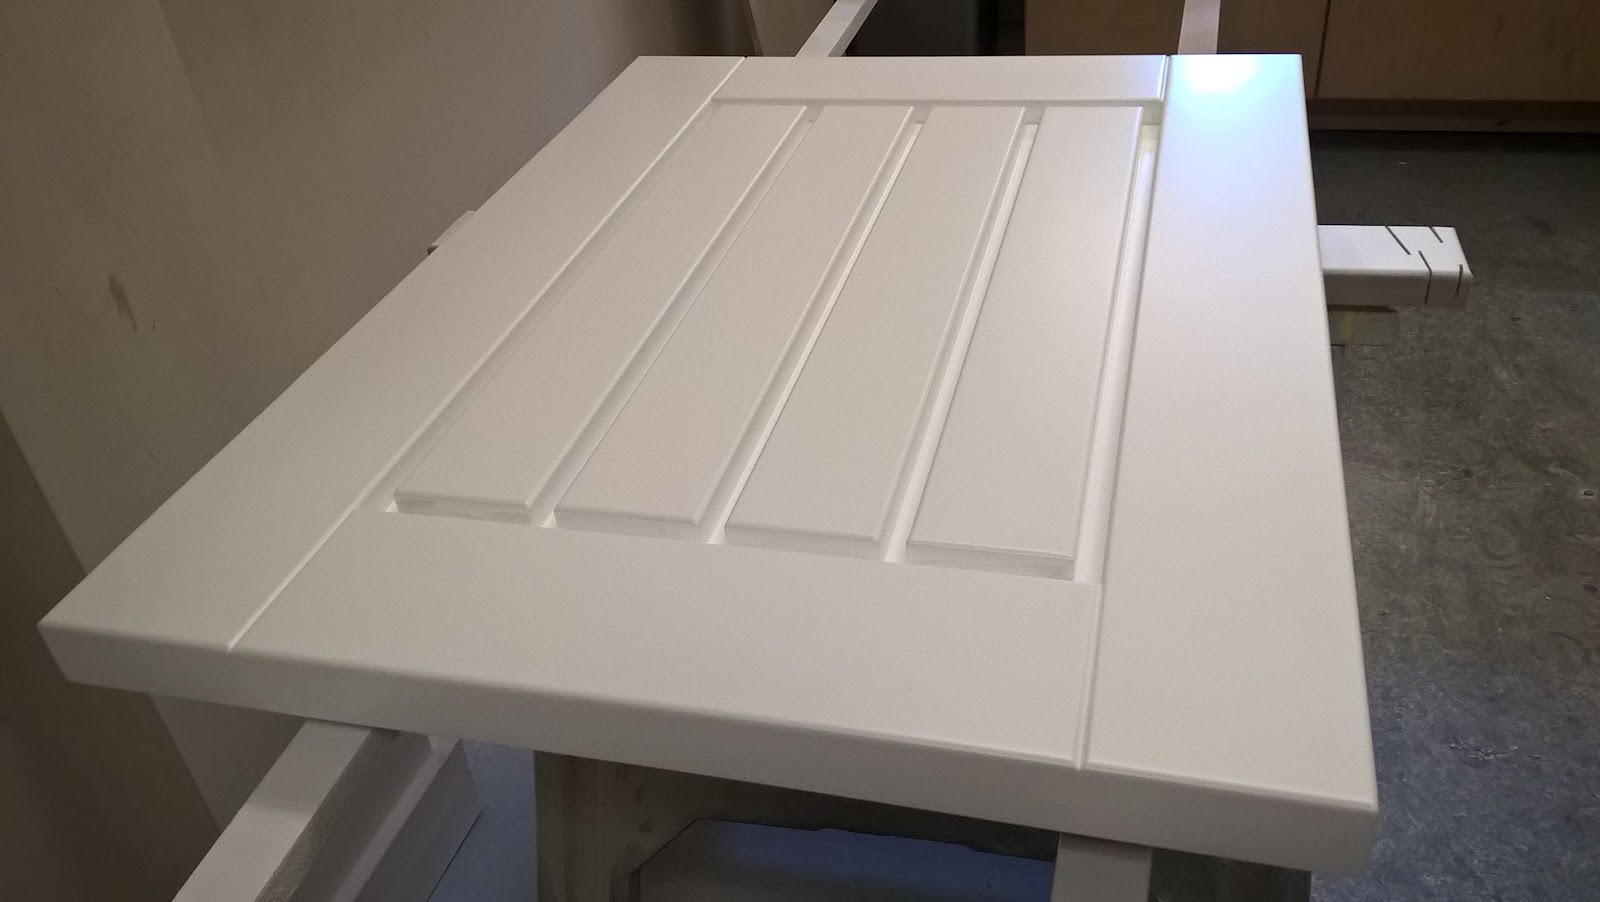
Another observation was how much heat you can put through this Syntac epoxy - with Wests if you held the gun on it point blank you'd fry the saturated cloth solid almost immediately, not so with the new kid - it stayed wet. Because of the temperatures i'm post-curing with a couple of heaters and a quick touch of the cloth earlier this evening reveals a much smoother finish to the cloth too than Wests without peelply and the thought of not having to wash or sand this tomorrow makes me grin ear to ear.

Seriously if you have a job that requires epoxy, forget West Systems - meet your new epoxy system from reactiveresins.com:


Cheers RR fanboy.


Sunday 24 January 2016

Bulkheads a go go!


How about a foam composite Centaur:


Would like to do the rest of the boat in foam but the cost is staggering so will end up using ply for the rest of the structure, looks pretty cool and not a trace of softwood or hardboard anywhere.

Friday 22 January 2016

Still forward

As i'm writing this think i got, for the first time on this project some kind of reaction with the glass dust despite wearing me full face (gimp) mask and crime scene suit - bloody agony at the moment still i,ve got the first couple of bulkheads in the front, no pictures as yet as i rather embarassingly came to a shuddering halt after running out of laminating rollers.

Had a bit of a palava getting the stringers glassed in, starboard side went down all okay, few bubbles in the peel ply but no real problems but the port side just made my arse drag the next day as the peel ply had pretty much detached itself completely so spent what would've been the day templating and making the bulkheads washing and sanding instead, still all done and looking mighty like a purlin in a roof she now has a ring beam of sorts.

As i'm still waiting for the rollers i'd ordered days ago my attentions have centred on the rudder blade, i think because it keeps staring at me from the corner of the boat shed. Again like so much of this folly it looks kinda well............ meh, you know, not offensive nor particularly pleasing on the eye which as someone like me who permanantly fidgets and is prone to rather impulsive moves started doodling and reading some old text books from my days studying  the subject.

Plus a bit of banter over on the Westerly Anarchy thread at SA got the ideas flowing after a Greek lad got in touch as he wants to change the boats rudder shape - i should point out he has the fin keel Centaur, a Pembroke, and quite rare they are too by all accounts, less than a hundred made, his boat looks in good nick but the rudders profile as it is an absolute howler, its almost eye-bleach terrority to be honest, NACA 0050  anyone?  - Its that bad.

After posting pics of mine and how i went about it plus some good points courtesy of Bob (Perry) and a handful of others got me thinking about mine - i should say i will launch this boat at some point i just dont know when, bear with me it'll be worth it - honest.

After googling and finding a couple of papers on the subject of tubercles and rudder design in general i got to draw some shapes, plus i'm wondering whether to keep the skeg although i guess it offers protection to a degree.

Now i'm the first to admit she's only a boxy 60's caravan of a 4KSB but thats no excuse for not getting her whizzing along (stop laughing) at a half decent pace and seeing as my original rudder looked like a futuristic cricket bat and the last Centaurs ever built had a rudder resembling a childs drawing of an aircraft wing thought it deserved a bit more .........well................ thought.

The only problem on mine is the shaft is worn to the point where in certain sea conditions i can see it jamming against the skeg but will follow this up with re-assembling it on the boat in the next couple of weeks and seeing if its as bad as i remember................................

The Fiddler.

Monday 11 January 2016

Back to business.


Spent the weekend getting the stringers in the hull, they're all in now, just need to glass them in, was hoping to do this today but got sidetracked knocking-up endless amounts of cabosil-thickened polyester to make the gert great fillets with.

Still all done now, cant do much tomorrow but Wednesday i'll jump back on it get busy with the Wests and cloth to get it all fixed to the hull. I wasn't initially impressed with the corecell when i bought and used it to make the bulkheads back near the companionway as it had a tendency to twist even though each side had been sheathed.

But what can't be denied is how light this stuff is which kinda compels me to use it up front either side of the tank and the anchor locker compartment too. Think theres almost two whole sheets and loads of large offcuts so where its not structural i will use it up for compartments and lockers. The main bulkhead and heads i'll keep to the original 12mm marine ply spec.

Still feels good having binned the lot over the Christmas hols, normally after one of these 'Gulp' moments i spend a couple of weeks aftewards with a dodgy gut thinking what have i done? But not this time seeing as theres no rotten ply, pine, hardboard and everything thats fitted is set to a laser level.

Cheers


Saturday 9 January 2016

Like sailing and being treated like a grown-up?

And not like a naughty fucking child who's just crayoned the hallway wall then consider this place your new online port of call:


You couldn't meet a more friendlier, knowledgeable crowd of sailing obsessives than this lot and with great content and an irreverent attitude - what are you waiting for?

Have been here a while but finally got my arse in gear last summer & set up a thread on Cruising Anarchy called Westerly Anarchy  for this rebuild and indeed all things Westerly and get this; they wont delete your account if you swear - even if you meant it...............................


Friday 8 January 2016

Apparently I was damaging the brand?


 It was worth it though - if nothing else for making a dull day fucking funny. Long live the interwebs!